
 A picture book text can paint a picture or it can set the stage for a corresponding visual story. Sort of the difference between
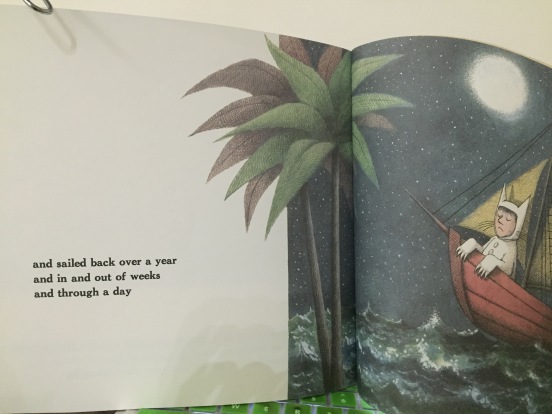
… and sailed back over a year and in and out of weeks and through a day…” (Where the Wild Things Are)
and
In the great green room there was a telephone …” (Goodnight Moon).
The first one paints a mood that the art alone can’t tell. The second one creates an image that accompanies the text. Both are good for the story they are telling, both create a visual without taking over for the artist.
The trick, as a text-only picture book creator, is to realize that you are a visual artist. Your text needs to create moods and images word by word, sentence by sentence, and it has to do it page by page and beginning to end.
One way to set yourself up for success in this area is to storyboard. Storyboarding your text will give you visual feedback on how your text works on each page. If you have a text-heavy page, you’ve either stepped into the artist’s area, or you have too many words, or your story may not be best suited as a picture book. You also need to be aware of your page turns.
In a recent 12×12 webinar, Mac Barnett talked about how he writes to the page turn (All the Wonders has a podcast with him and he mentions it there as well). In other words, when you draft your story, you need to find text that compels your reader to turn the page.
I’ve used three storyboarding methods to help me gauge page turns and visual appeal, and I like each one for different reasons.
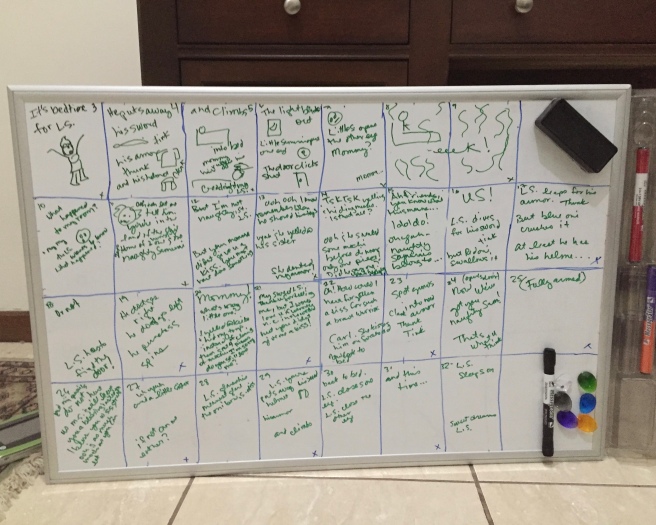
Whiteboard method:
I thought I had this manuscript ready, but when I storyboarded it, I ended up erasing several more lines of text. Why? I could see that the art was the better medium for conveying that part of the story. I could also see that the pacing was off, that some pages got bogged down in too much “fun” language–great to read on a continuous white page, but completely irritating when the story needs to move on.

I’ve done the same grid method on paper too, but erasing is a bear when you realize you need to rethink your text. I break my grids into 14 1/2 spreads-ish. Not all pictures books follow that format, some are closer to 12 spreads and some even more, but 14 1/2 seems pretty standard. (See Tara Lazar’s awesome post about picture book layout).
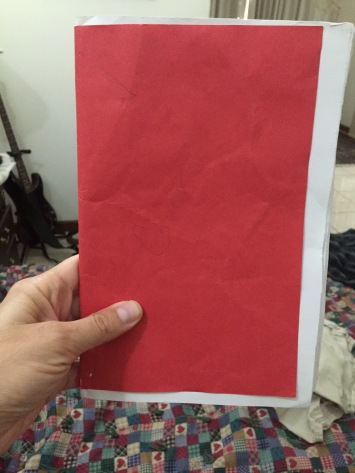
Dummy:
In order to save a few trees, I don’t make a new dummy for every story. I have a reusable dummy and use post-its, large and small, to manipulate the text across the page. I put the text at the bottom right page that I think best creates an effective page turn, then I flip through the dummy and see how it all flows.
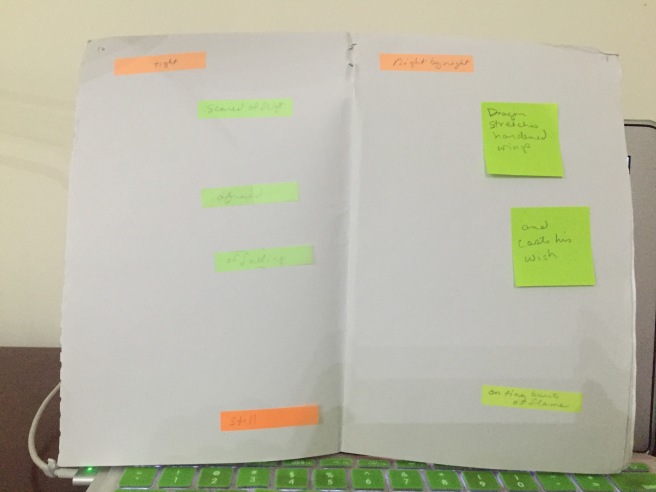
Using a dummy is great for seeing if your text creates the needed page turn. It also shows you if something needs to be repeated or modified once the page is turned. For example, an attribution that makes sense when the dialogue is on one page may not make sense if the sentence or thought comes after a page turn. Or you may need to carry the same context onto the next page. Such as:
Same page:
When he looks into the mirror, he might notice his hair needs a trim. So he’ll probably ask for a pair of nail scissors. When he’s finished, he’ll want a broom to sweep up.
Two pages:
When he looks into the mirror, he might notice his hair needs a trim. So he’ll probably ask for a pair of nail scissors. page turn
When he’s finished giving himself a trim, he’ll want a broom to sweep up. (If you Give a Mouse a Cookie)
Page Indicators:
 Another easy method, perhaps not really a storyboard, is to simply indicate your pages in your manuscript. Quite a few authors submit their stories in this format. Be aware, however, that some agents and editors dislike this format when reading a story for the first time. I can understand why. I don’t like to edit or even read my stories written out like this, it’s too irritating on the eyes. I do, however, create and keep a draft with the page turns indicated, but I don’t submit it that way. I make another copy without page indicators for submission (Very easy to do in Scrivener, btw.).
Storyboarding methods are as varied as the people who use them, so find a way that works for you to set your manuscripts up visually. You’ll be amazed at how much better your writing and editing process becomes when you treat your picture book text as a visual art.
Good luck and happy writing.
Other resources:
http://www.childrensbookacademy.com/blogateers/storyboarding1
http://clairelordon.blogspot.com/2016/06/from-manuscript-to-storyboard.html
http://www.wordsandpics.org/2013/08/picture-book-basics-sketches-and-layout.html
https://traceymcox.wordpress.com/2015/09/24/thinking-thursday-storyboarding/
http://www.scottefranson.com/publishing-2/publishing-for-children-101-what-is-a-storyboard
Every Picture Book Author Should Make a Storyboard (plus a giveaway!)

This is so helpful, thank you! I’m a complete beginner and your post is amazing! 🙂
LikeLike
I’m so glad. Good luck!
LikeLiked by 1 person
I use the dummy as I’m editing, but I love the idea of using a white-board and seeing the whiole story out in front of you! Thanks, Johnell
LikeLike
Thanks, Tracey. It is nice to see the whole picture in front of you, but I do love dummies as well.
LikeLike
Johnell, thanks so much for this info! I’m never comfortable with making a dummy so I’m anxious to take a WIP and walk through this!!
LikeLiked by 1 person
Good luck! Thanks for stopping by.
LikeLike
Super post,Johnell…and a great heads up for me to remember to make a storyboard for my manuscripts…I’ve done several…and they are always helpful…especially in seeing the page turns and whether I’ve got enough scenes for a book. Thank you so much! And I loved the great links you provided to other storyboard posts.
LikeLiked by 1 person
Thank you, Vivian!
LikeLike
Such good ideas. I prefer the dummy the best because then I can do the page turn but I should make a bigger one and use post-its. I do use the grid on a single piece of paper when the text doesn’t have too many words.
LikeLiked by 2 people
Cool. It’s helpful to hear what other writers do in their drafting process.
LikeLike
This is just what I needed right now Johnell. Thank you!
LikeLiked by 1 person
I’m so glad it helped in some way. Thanks for the comment.
LikeLike
Johnell, what a great collection of ways to storyboard. I have used a few and find them very helpful. Thanks.
LikeLiked by 1 person
Thanks, Maria. I’d love to hear about your storyboarding methods as well.
LikeLike